Building My Self-Hosted Website (2022-2023 Project)

Project URL: https:/www.rcomputing.co.uk
The Begining
Migrating from SiteGround to Oracle Cloud Free Tier with Docker
In 2022, as a self-employed IT professional just starting out, I needed an affordable way to host my own website. I had zero experience building or managing websites at the time.
My first approach was simple: I signed up with SiteGround (they had a big first-year discount), installed WordPress through their one-click installer, and built the site using the Beaver Builder plugin. I registered my domain (www.rcomputing.co.uk) through Cloudflare and pointed it to SiteGround. It worked great for about a year.
Then the renewal email arrived—the price was going to jump significantly. I started researching cheaper (or free) long-term alternatives and decided on Oracle Cloud Always Free Tier. It offers a powerful VM with 4 ARM-based Ampere A1 cores and 24 GB RAM completely free (as long as you stay within limits).
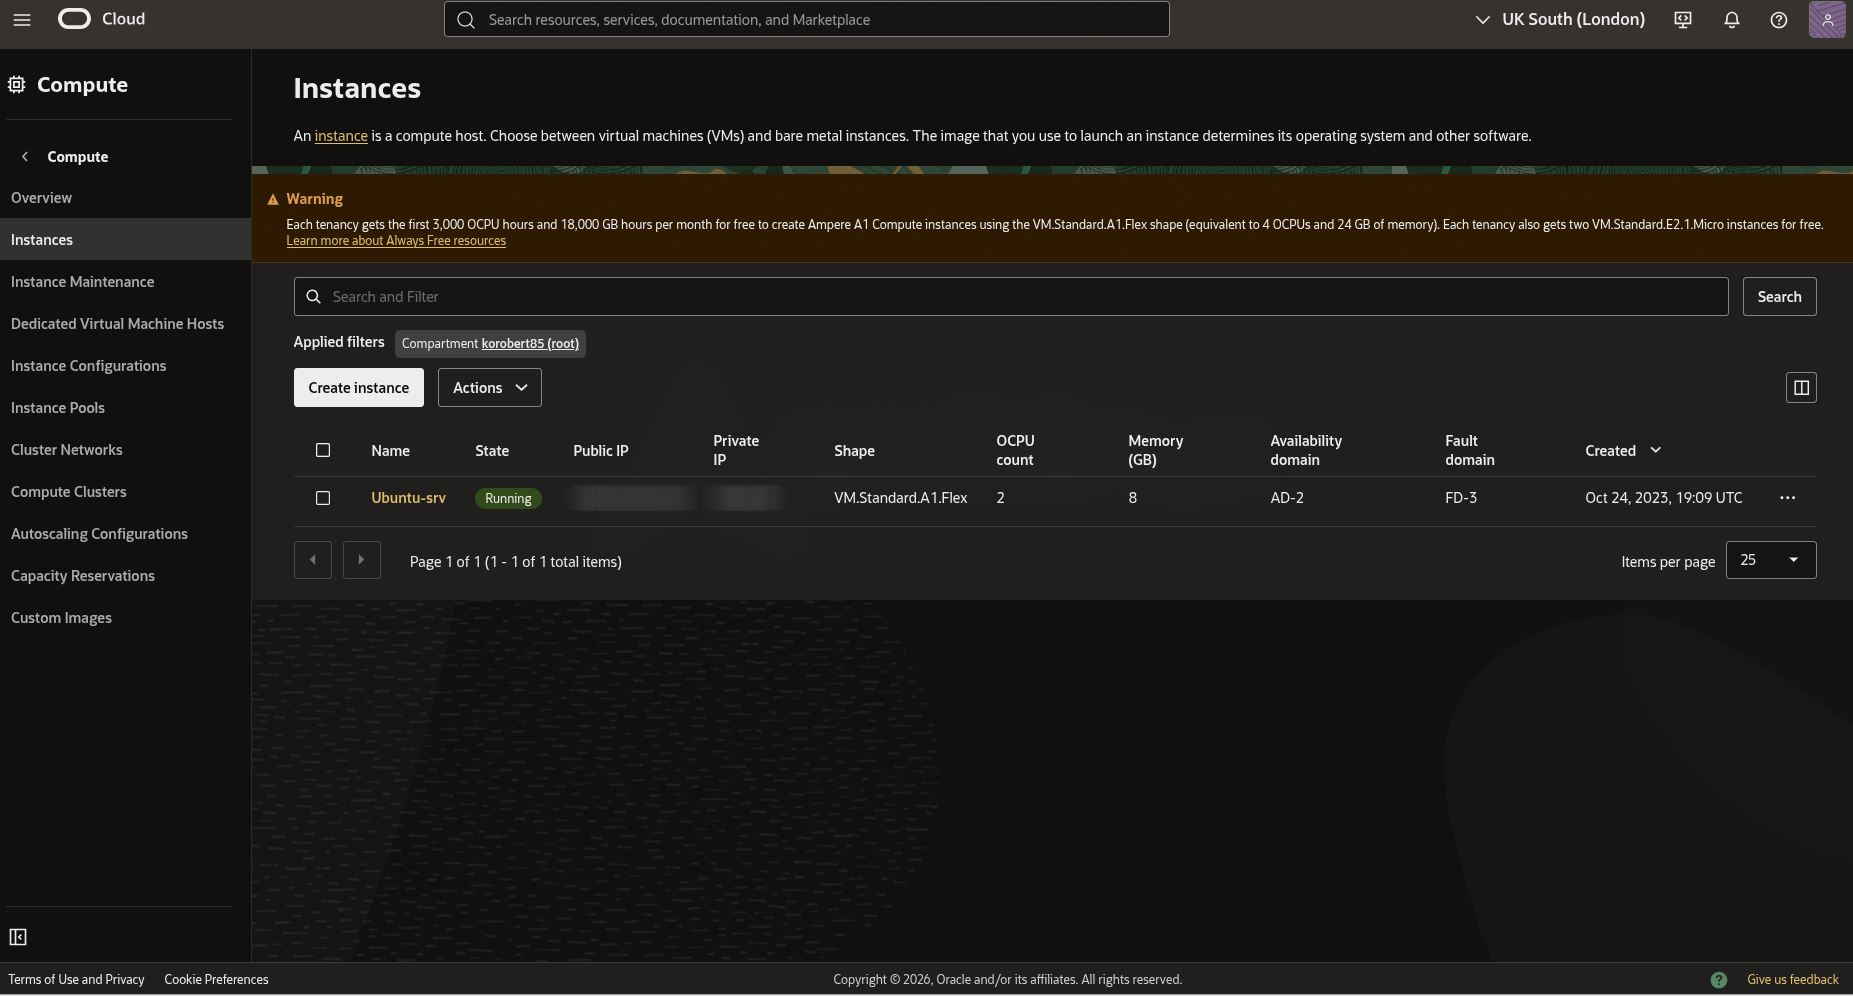
Step 1: Setting Up the Oracle Cloud VM
I created a VM.Standard.A1.Flex instance in Oracle Cloud and installed Ubuntu Server (LTS version for stability).
Key first steps after installation:
- Immediately configured SSH key-based access so I could connect securely from my Linux desktop without passwords.
- I didn't allocate all 4 OCPUs / 24 GB right away—I used a smaller shape initially (2 OCPUs with 8GB ram) to reduce the chance of the instance being reclaimed due to prolonged idleness. Oracle sometimes reclaims idle Always Free resources, so keeping some light activity (or occasional reboots/scripts) helps.
Step 2: Installing WordPress via Docker
Instead of installing WordPress directly on the host (which can get messy), I used Docker for clean, reproducible setups. Make it more clear and easy to do backup later I put every docker to there own directory. It is looks like that now.
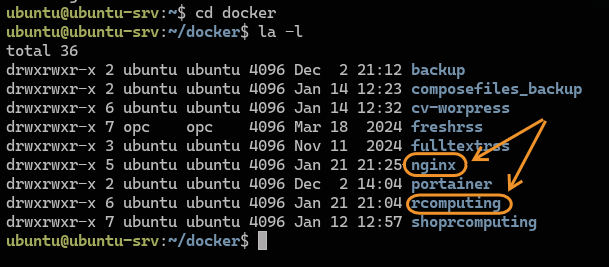
I deployed the first container:
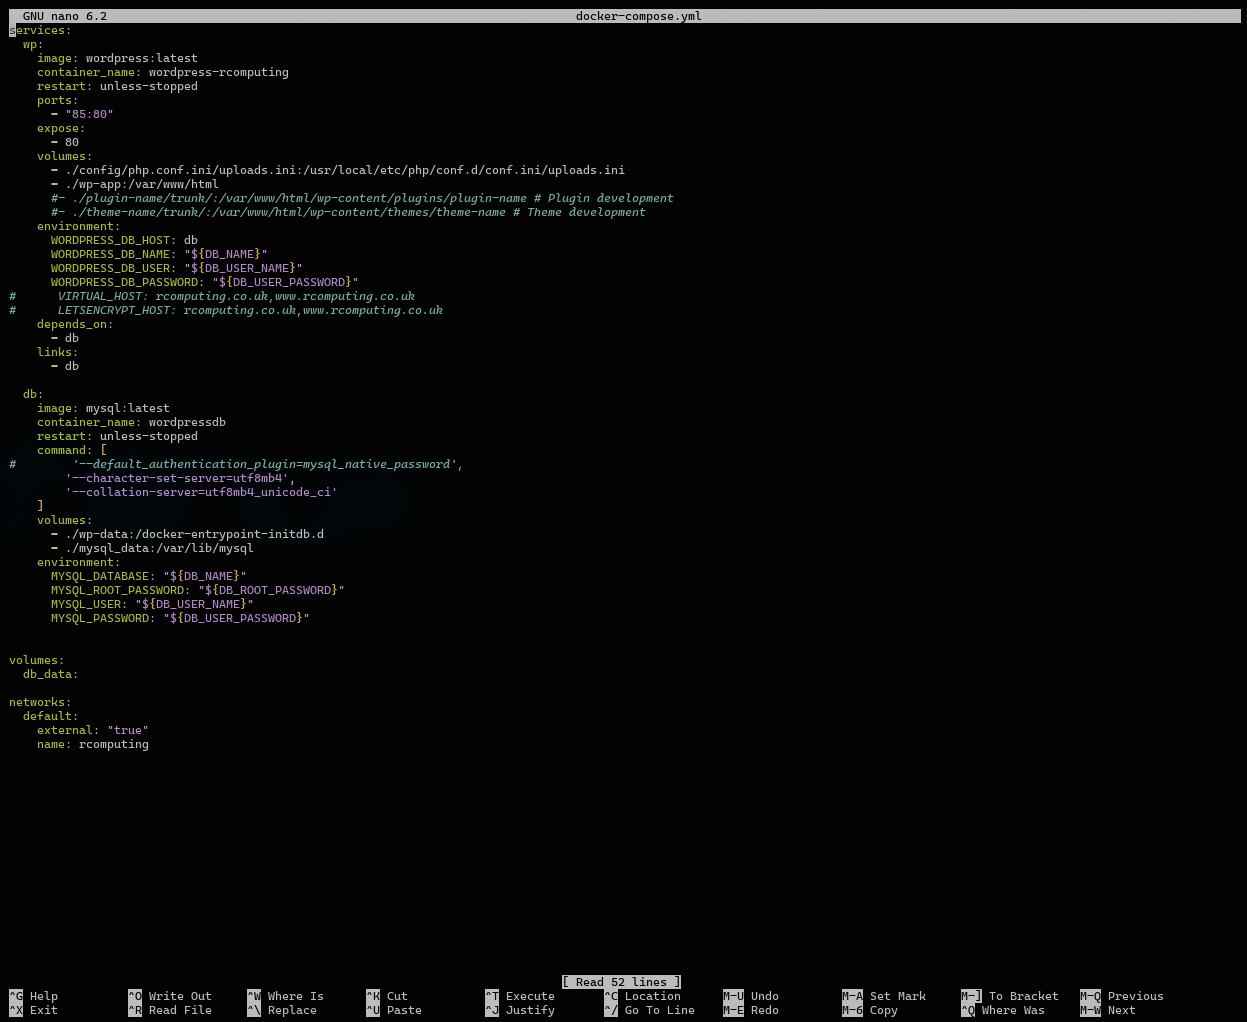
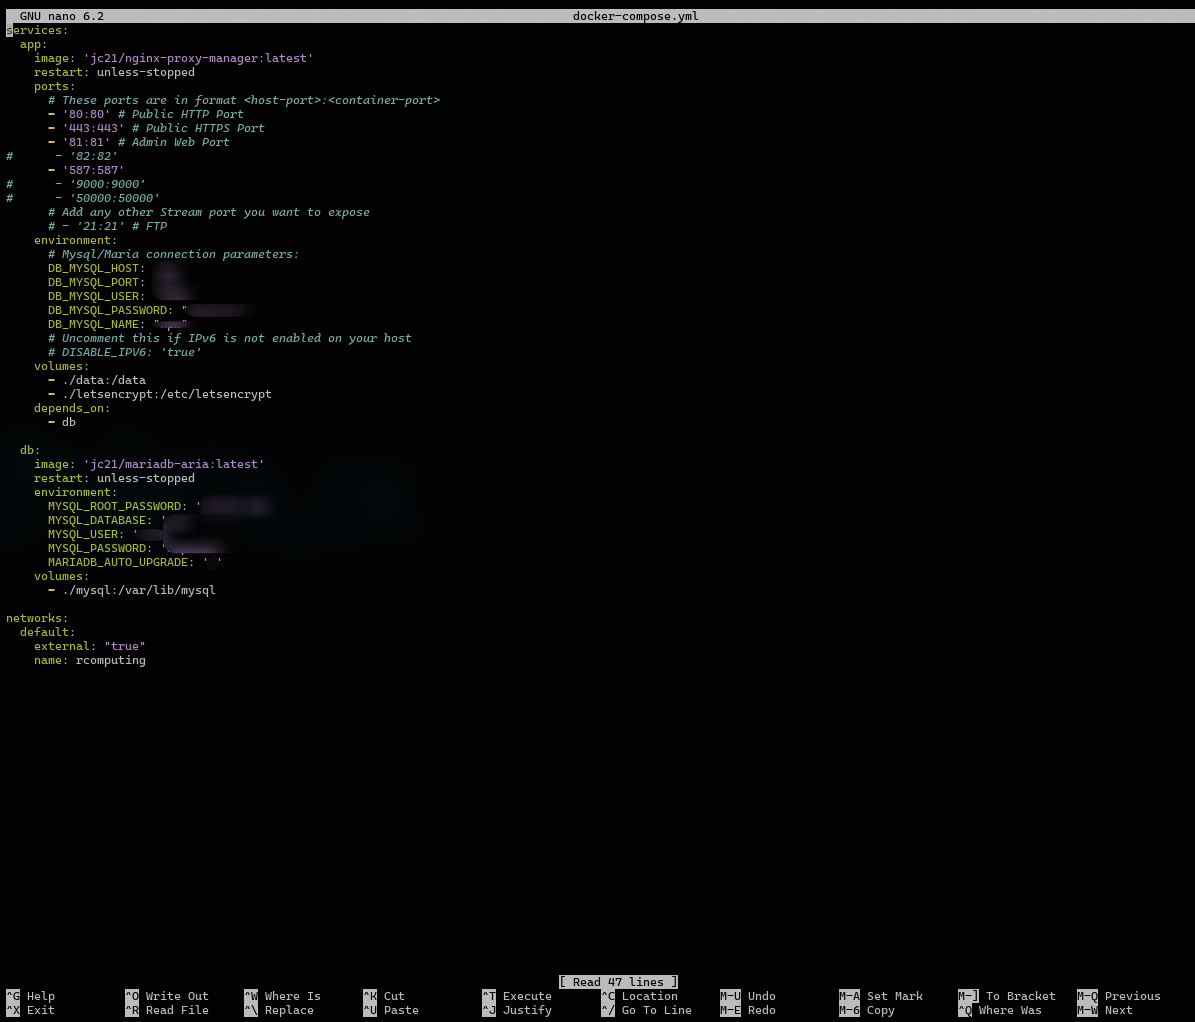
- WordPress (official image) + MariaDB/MySQL for the database. You can see the docker-compose.yml file below and also you can copy from my github is well. This compose file required an .env file ( also see below ) i blurred out my username and passwords so set your own.
- make a docker directory and a directory for the wordpress inside the docker directory.
mkdir docker
cd docker
mkdir rcomputing
nano docker-compose.yml
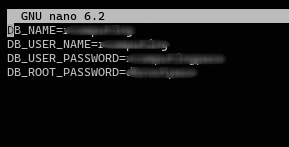
nano .env
docker compose -f docker-compose.yml up -dBecause I had never used Docker before, I spent a few hours reading documentation, watching YouTube tutorials, and learning the basics. Once I understood the fundamentals, I searched for a ready-made docker-compose file for WordPress, copied it, and customized it to fit my needs.
this is the .env file
Step 3: Migrating from SiteGround
To move my existing site:
- I backed up everything from SiteGround (files + database).
- I used a popular WordPress migration plugin like All-in-One WP Migration ( Please note the plugin what you can install via "add new plugin" in wordpress is limited to 12GB )
- Here is a video and a link the exact one i used All-in-One WP Migration,
- Exported the full site from SiteGround.
- Imported it into the my new Docker-based WordPress on Oracle Cloud.
Once the content was over, I updated the A record in Cloudflare to point my domain to the Oracle Cloud public IP.
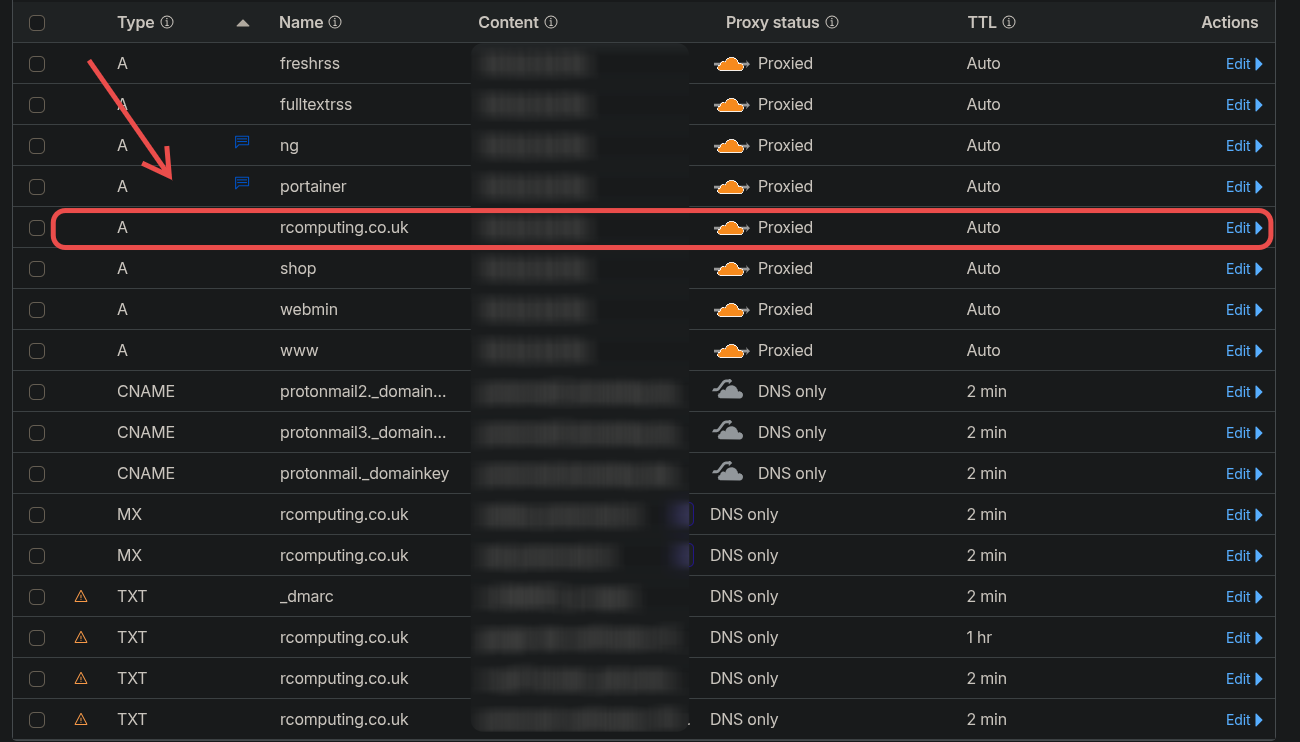
You can see on the picture few other A records those are a different projects.
Step 4: Fixing HTTPS / SSL
After the move, the site loaded over HTTP only, SiteGround had handled Let's Encrypt SSL automatically before.
To fix this:
- I set up NGINX in a separate Docker container as a reverse proxy in front of WordPress.
- NGINX now terminates HTTPS, redirects HTTP → HTTPS, and proxies requests to the WordPress container.
mkdir nginx
cd nginx
nano docker-compose.yml
docker compose -f docker-compose.yml up -d
I did the same as with the wordpress, I searched for a ready-made docker-compose file for NGINX, I copied it and customized it to fit my needs. In both compose files, I created a custom Docker network so the containers could communicate with each other securely and efficiently.
This setup keeps everything isolated and easy to backup/upgrade. After spinning up the containers, I had a fresh WordPress instance running locally on the VM. This gave me secure (https://) access without paying anyone. I can reach the nginx server as in a following at serverip:81 and i need to set an email address and password at the first login. The next step i set a subdomain for my NGINX server because at the moment the serverip:81 is an unsecured HTTP connection. So i went back to my cloudflare account and set it up.
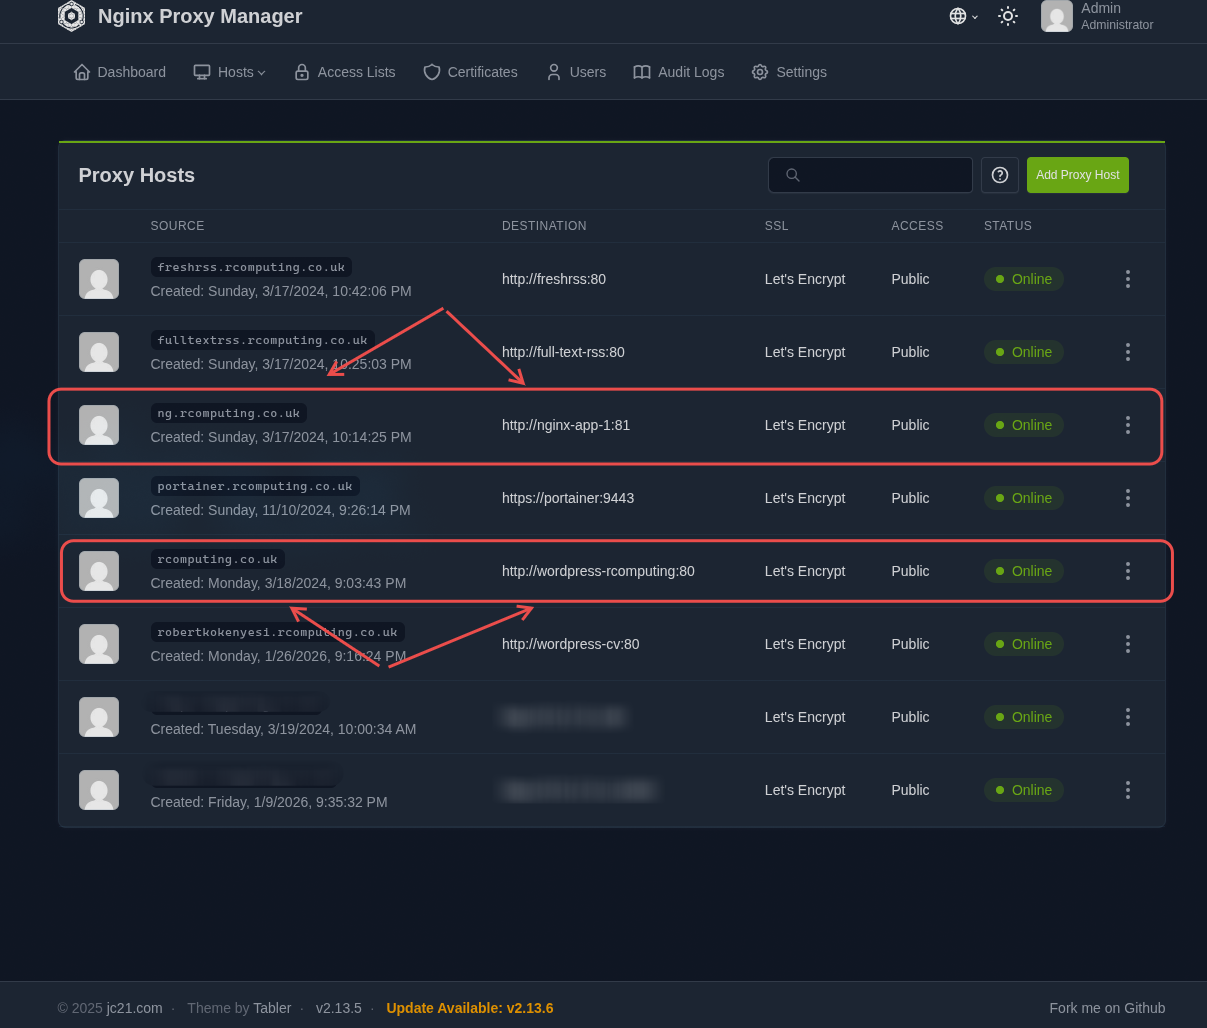
![]() Then i logged in to my proxy server and i added the following two domain name
Then i logged in to my proxy server and i added the following two domain name
and forwarded them to the docker containers name and port 80. Now i can reach my proxy manager and my website with HTTPS connection.
Current Setup Highlights
- Domain & DNS: Managed fully in Cloudflare (custom domain + subdomains).
- Web server: NGINX reverse proxy + WordPress in Docker.
- Backups: Simple custom Bash script that automatically backs up containers/volumes ( This is detailed in this project)
- Access: I manage everything via SSH from my main Linux machine (i use Omarchy btw). I also set up Remmina for occasional GUI remote desktop, but SSH is faster.
This project has been running reliably since late 2022/early 2023. It proves I can:
- Self-host production services on cloud infrastructure
- Handle Docker deployments and networking
- Manage domains, SSL, and migrations
- Automate basic tasks with Bash
It's live at www.rcomputing.co.uk and serves as a real-world example of my cloud, networking, and Linux skills while I look for full-time remote IT/system admin roles.
Feel free to reach out if you'd like more technical details.
Robert Kokenyesi.