Archives: Projects
Projects
Updating my existing docker container
In this blog post earlier I wrote about my home lab in the Oracle Cloud server where I run an Ubuntu server with few Docker containers. There I host this website, my resume website and also few other projects as well.
The update process
Now in this write I would like just share how I updating my existing Docker containers. You can see the video above.
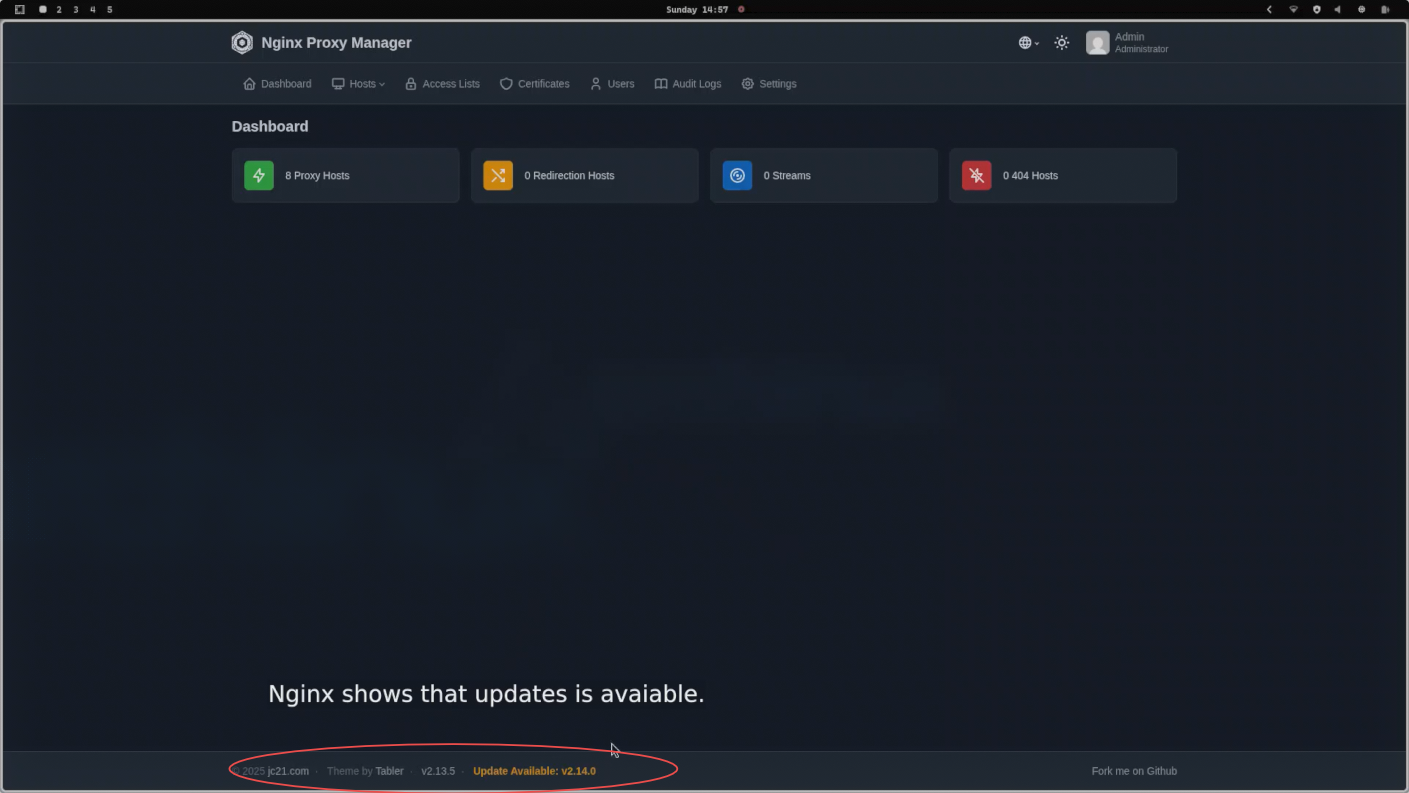
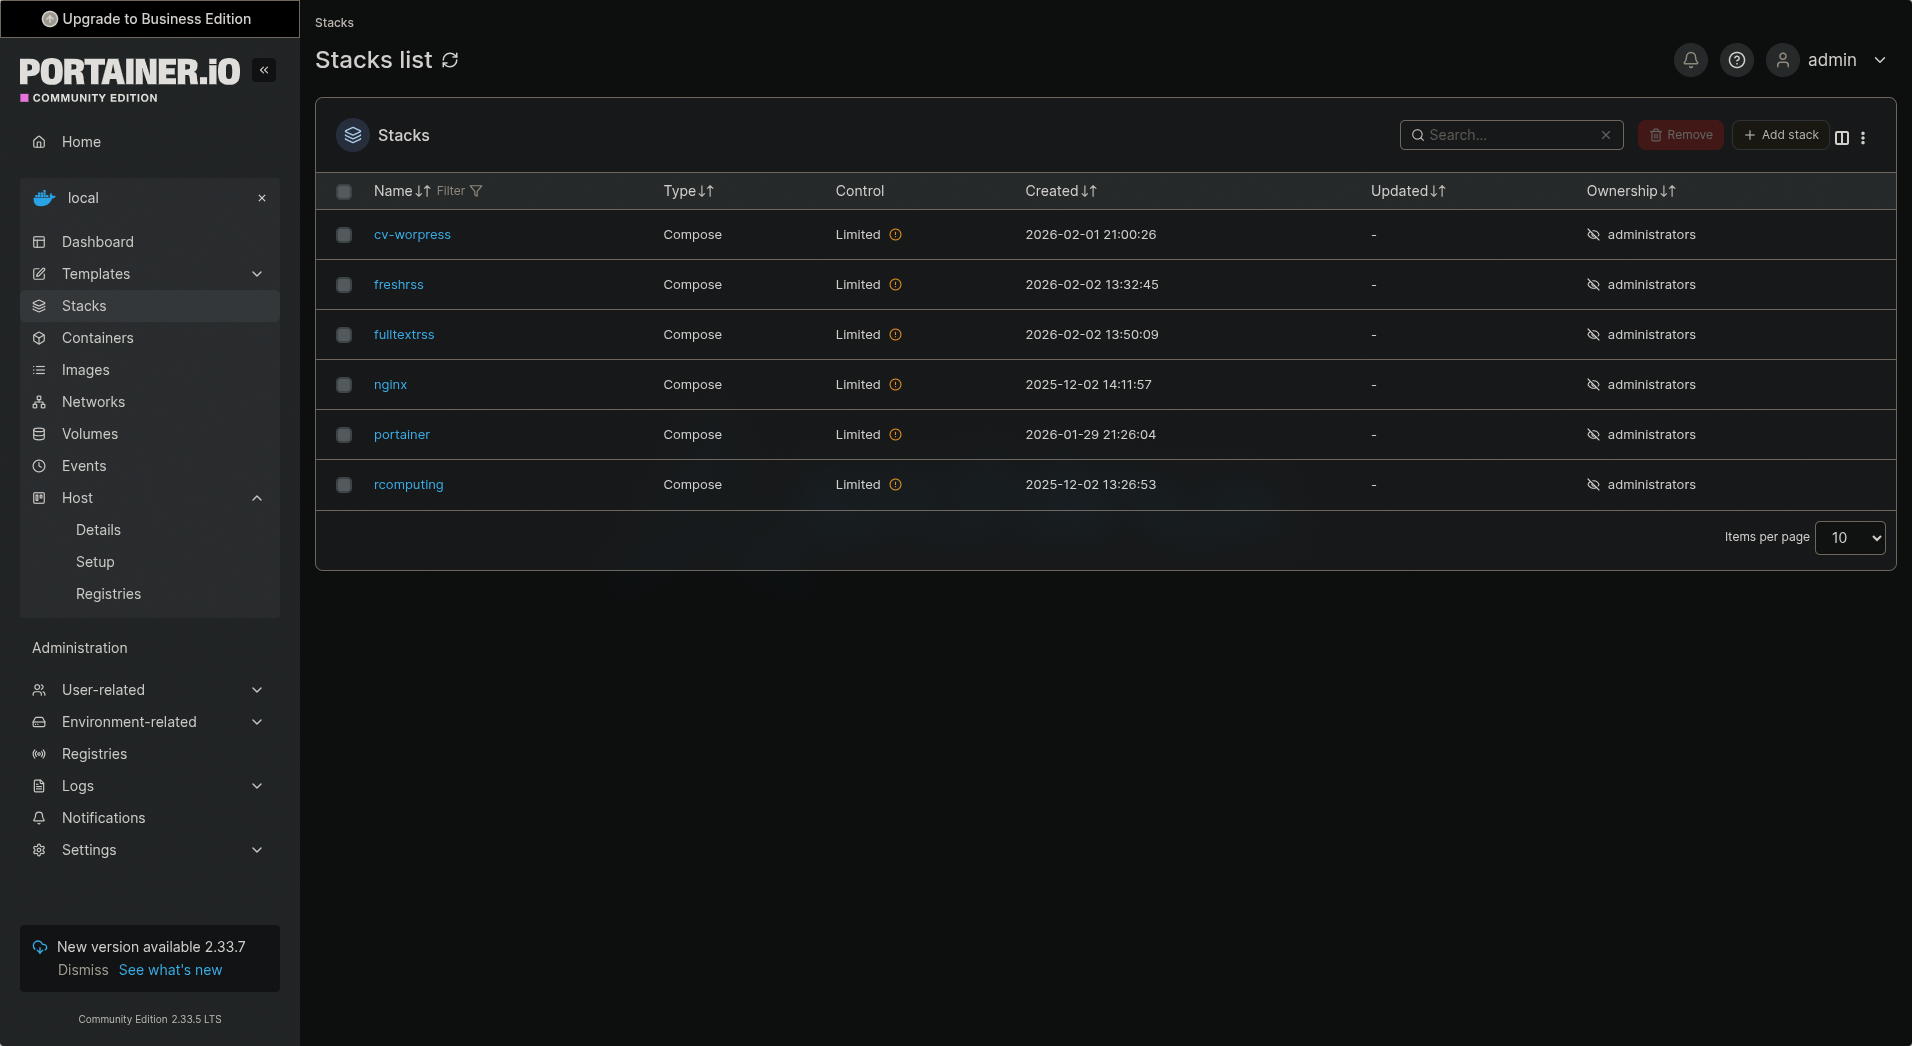
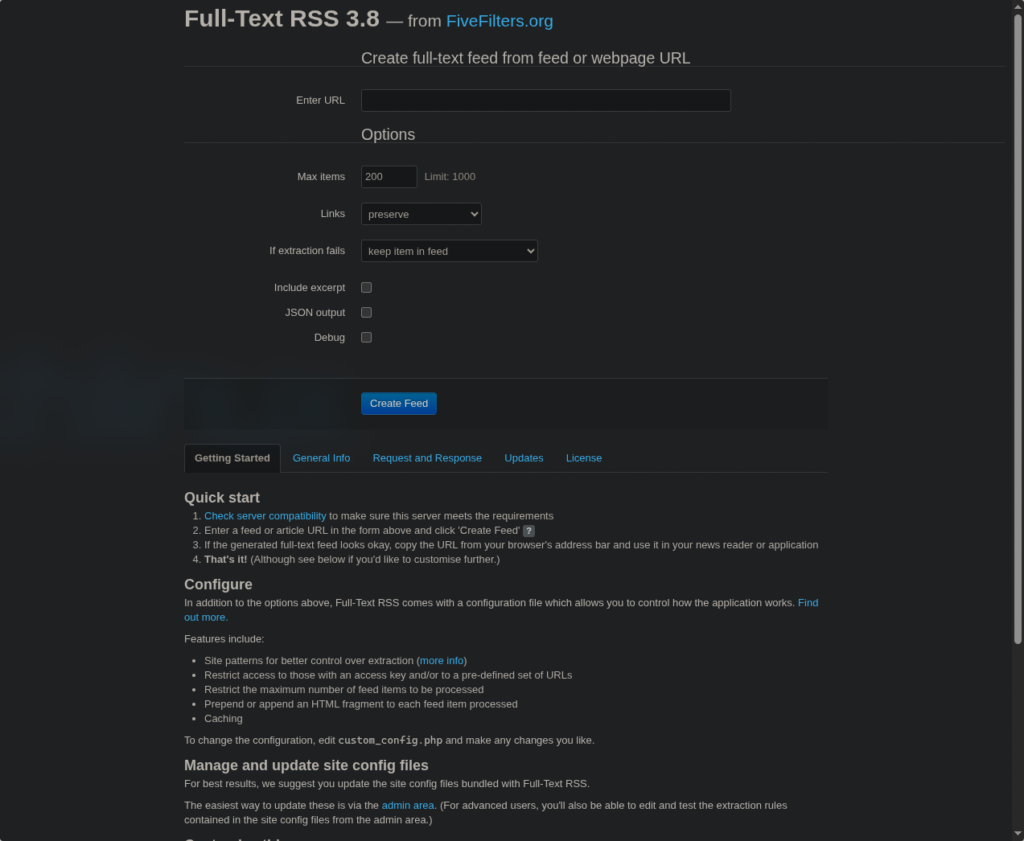
On the picture below you can see that the proxy server has an available update.
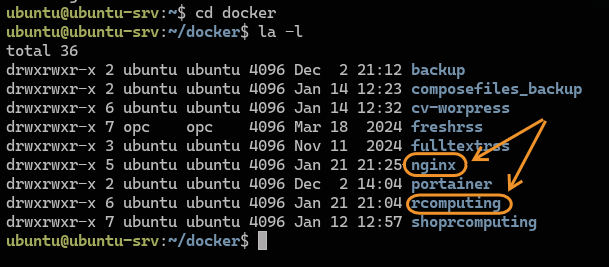
So, on my server, I use one directory, the Docker directory, and under this directory, every Docker container has its own directory where they live. Please make sure before every update you have backup, just in case if something is going wrong. In my case, the backup is automatically made at night time via bash script using crontab.
So I enter the docker container directory where I want to do an update and I run the following commands.
cd docker/nginx
docker compose pull
docker compose up -d --force-recreate --remove-orphans
So the Docker compose pull command will download the latest image for the Docker but be make sure that in the compose file at the image section has a write "latest" and not an exact image version. The second command will recreate the docker with the new downloaded image file and will remove the orphans.
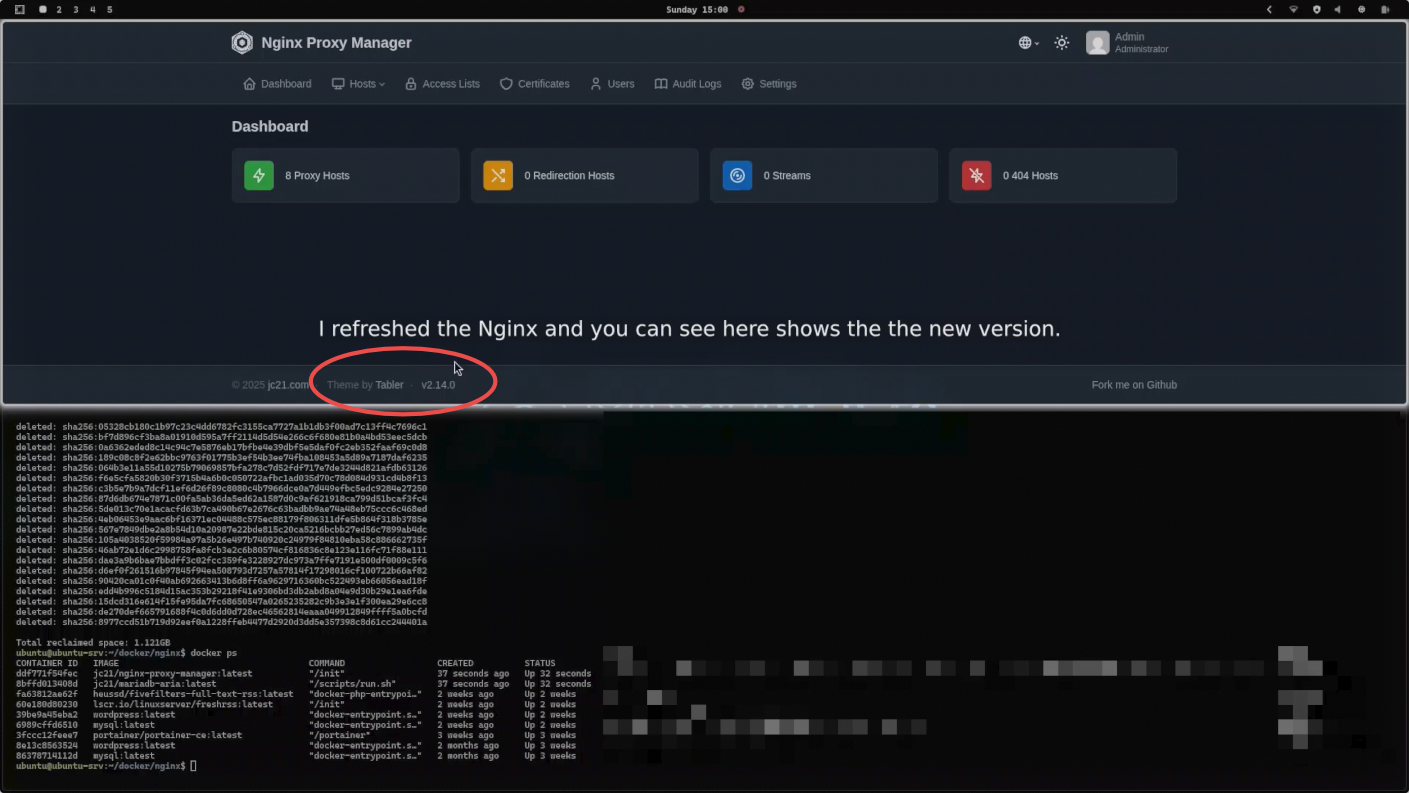
The next command below will delete all the old image files what is not necessary anymore.
docker compose image prune -fSo now I have an updated proxy server. You can see on the picture below as well.
Robert Kokenyesi
VPN manager for Omarchy ( Arch based) linux.

Project URL: https://github.com/robertkokenyesi/vpn-manager
The Problem
I recently switched to Omarchy Linux (a minimal Arch-based distro by DHH), and ran into an annoying issue - ProtonVPN's official app just didn't work. The GUI kept crashing and the CLI tool was clunky. I needed a simple way to toggle my VPN without opening terminals or running commands every time.

The Solution
I built a lightweight VPN manager that integrates directly into Waybar (my status bar). Now I can:
- Click once to connect/disconnect
- Right-click to switch between VPN servers
- VPN automatically reconnects after my laptop wakes from sleep

How It Works
The system is built around four main bash scripts:
vpn-toggle.sh
-
- handles the connection logic. It uses a lock file to prevent double-clicks (it was an issue for me with Waybar, i did not find the reason yet), checks if the VPN is currently active using ip link show, and then starts or stops the appropriate systemd service. The script also runs resolvconf -u before connecting to fix DNS issues I kept running into.
vpn-status.sh
-
- runs every 3 seconds and outputs JSON that Waybar can read. It checks if the VPN interface exists and returns the appropriate icon state (connected/disconnected/none). This is what makes the visual indicator update in real-time.
vpn-select.sh
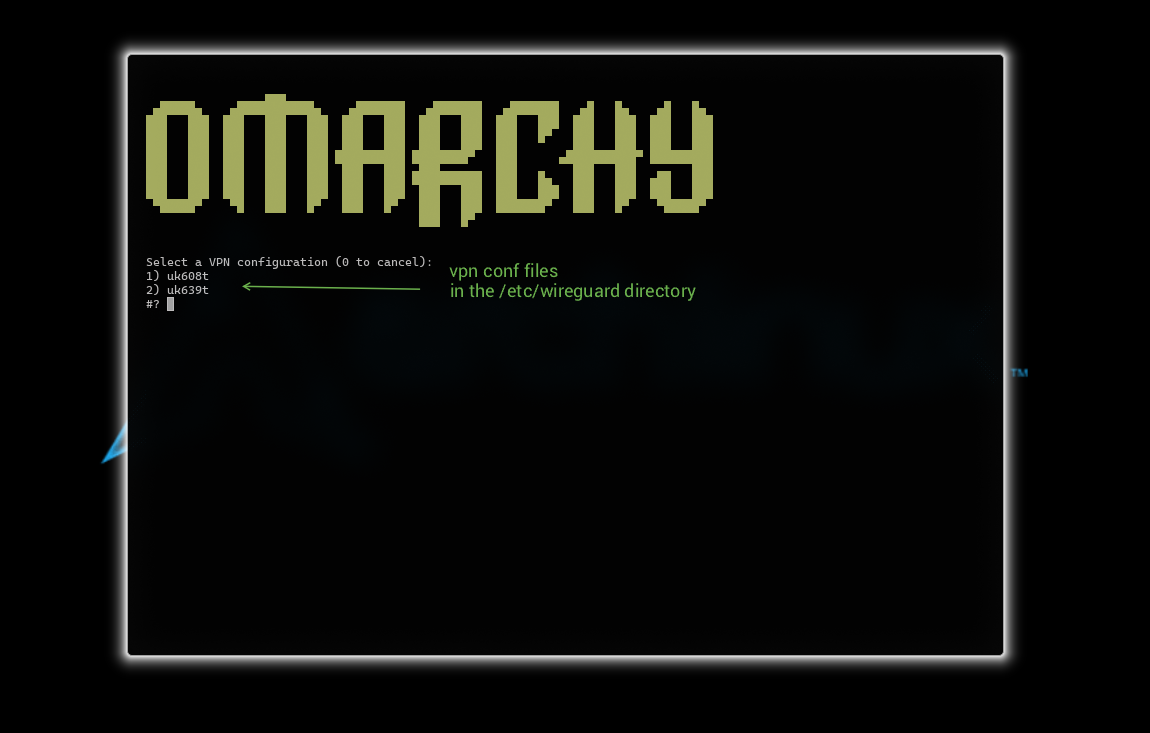
-
- lists all WireGuard configs from /etc/wireguard/ and presents them in a terminal menu (using Omarchy's floating terminal launcher). When you select a different server, it stops the current VPN, updates the config file, and starts the new one - all seamlessly.
The Suspend/Wake Problem
The trickiest part was getting the VPN to reconnect after suspend. When you close your laptop lid, Linux suspends to RAM and kills active network connections. The VPN interface stays "up" technically, but the connection is dead and routes are broken.
I solved this with vpn-restore.sh - a script the installer generates that checks if the VPN was enabled before suspend, and if so, restarts the WireGuard service after wake. A systemd service (vpn-restore.service) triggers this script automatically when the system wakes up. It includes a wrapper to find the logged-in user (since the service runs as root) and executes the restore script in their context.The Boot Problem
Another issue I hit: VPN wouldn't connect reliably on boot. The WireGuard service would start before the network was ready, fail, and give up. The solution was adding systemd service overrides to every VPN config:
After=network-online.target
Wants=network-online.target
This tells systemd "don't start the VPN until the network is actually online". The installer creates these overrides automatically for all your WireGuard configs.
What I Learned
- This was great practice for:
- Writing bash scripts
- Working with systemd services and understanding service dependencies
- Managing Linux permissions and sudoers configuration
- Debugging suspend/wake cycles and systemd targets
- The importance of testing on real hardware (VMs don't handle suspend well)
My project is based on this github project >>> JacobusXIII - omarchy-wireguard-vpn-toggle, also got some AI help (Claude and Grok) for code structure and edge cases - it is a great way to learn best practices while building something useful.
The project is open source on GitHub. Feel free to use it if you're running into the same issue!
Robert Kokenyesi
Replacing my router with a PFSense firewall

Right now my home network still runs on a classic consumer Linksys router — it’s been reliable for years, but it’s starting to feel like the weak link in an otherwise increasingly serious self-hosted setup. I’ve decided it’s time to replace it with pfSense as my main firewall/router — giving me proper VLANs, traffic shaping, intrusion detection (via Suricata or Sensei), detailed logging, and much finer control over what devices can talk to each other .
This isn’t implemented yet — it’s still in the planning phase — but the goal is to turn an old mini-PC (or maybe grab a Protectli/Beelink box) into a dedicated pfSense appliance, connect it as the edge device, and finally move my router into bridge mode. Once that’s done, my home network will sit behind real enterprise-grade routing/firewall features instead of basic NAT and port forwarding.
Portainer: Managing Docker Containers the Easy Way

The Reason
After getting my website running on Oracle Cloud Always Free Tier with Docker (WordPress + MariaDB + NGINX reverse proxy), I added more services over time: FreshRSS, Full-Text-RSS, my Resume website (this site what you read now) others later.
All containers I built manually with docker compose up -d from command line – clean and reproducible. But checking logs, restarting, viewing stats, or inspecting volumes became time consuming without a GUI.
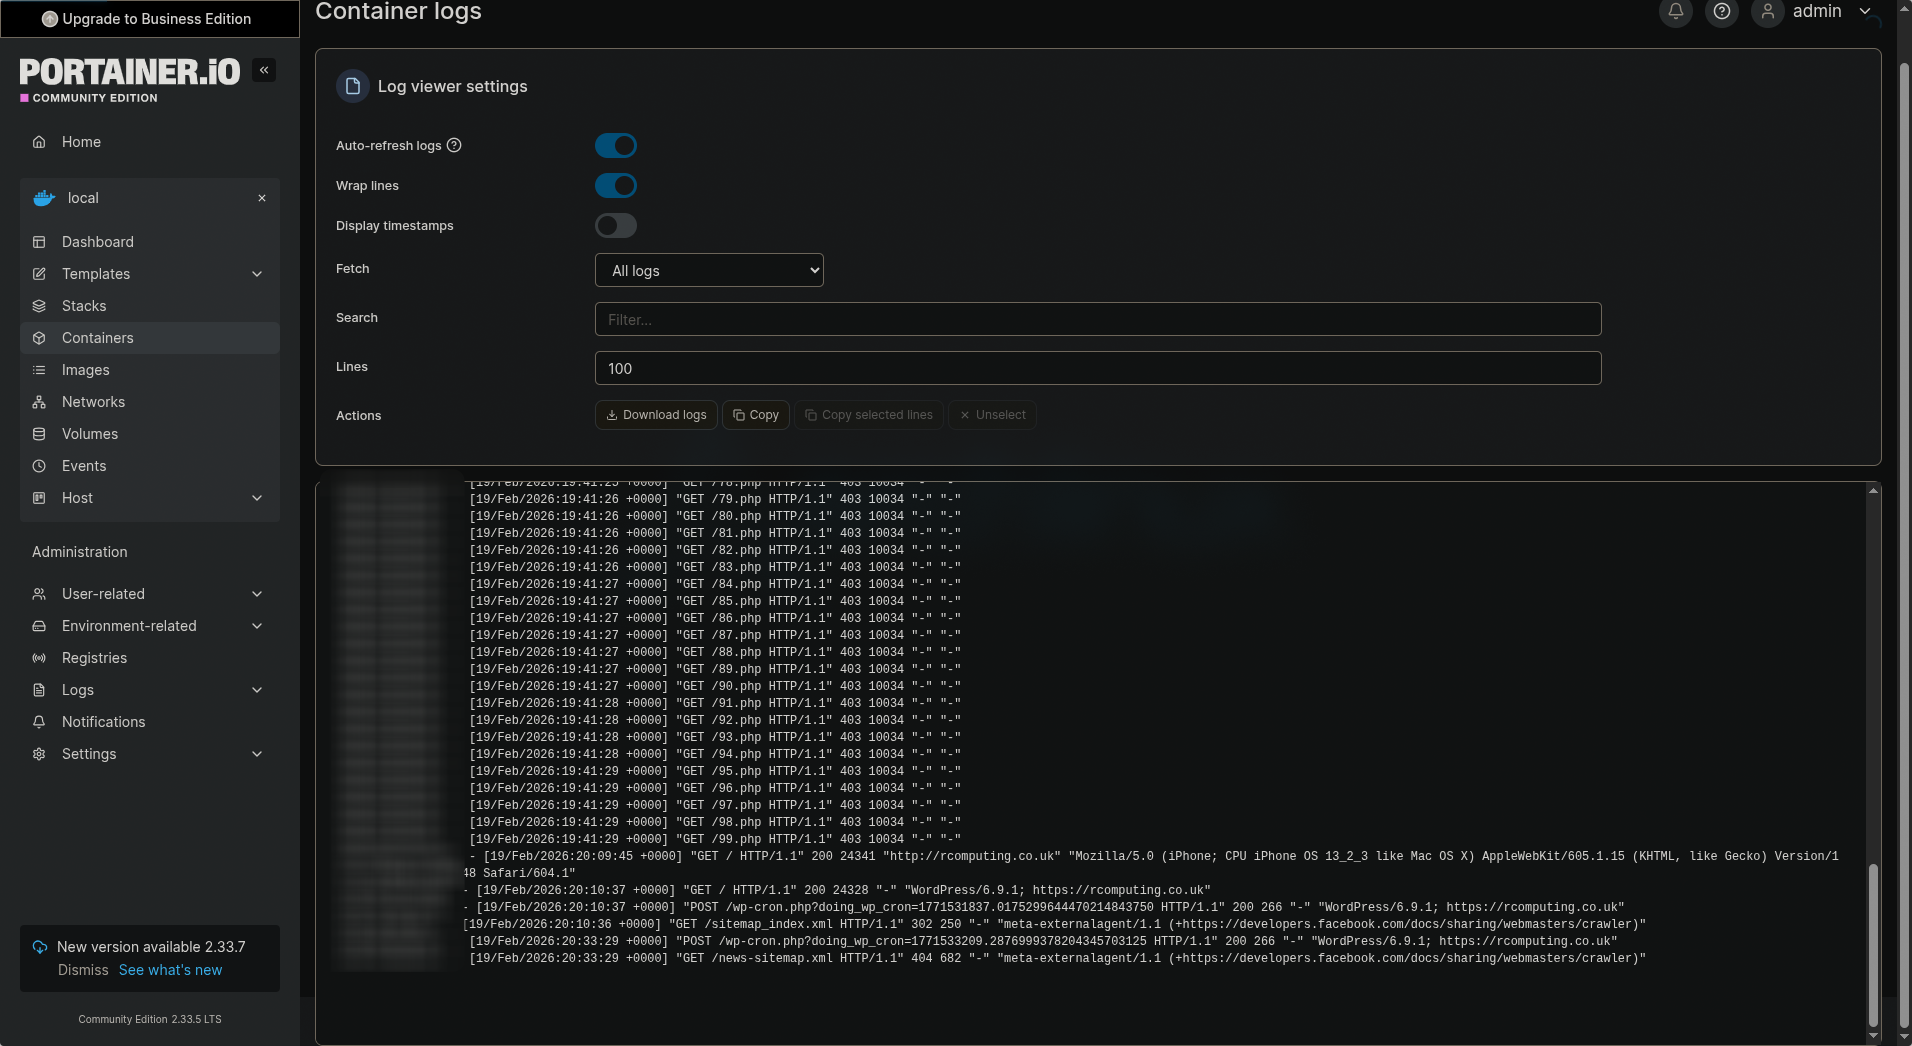
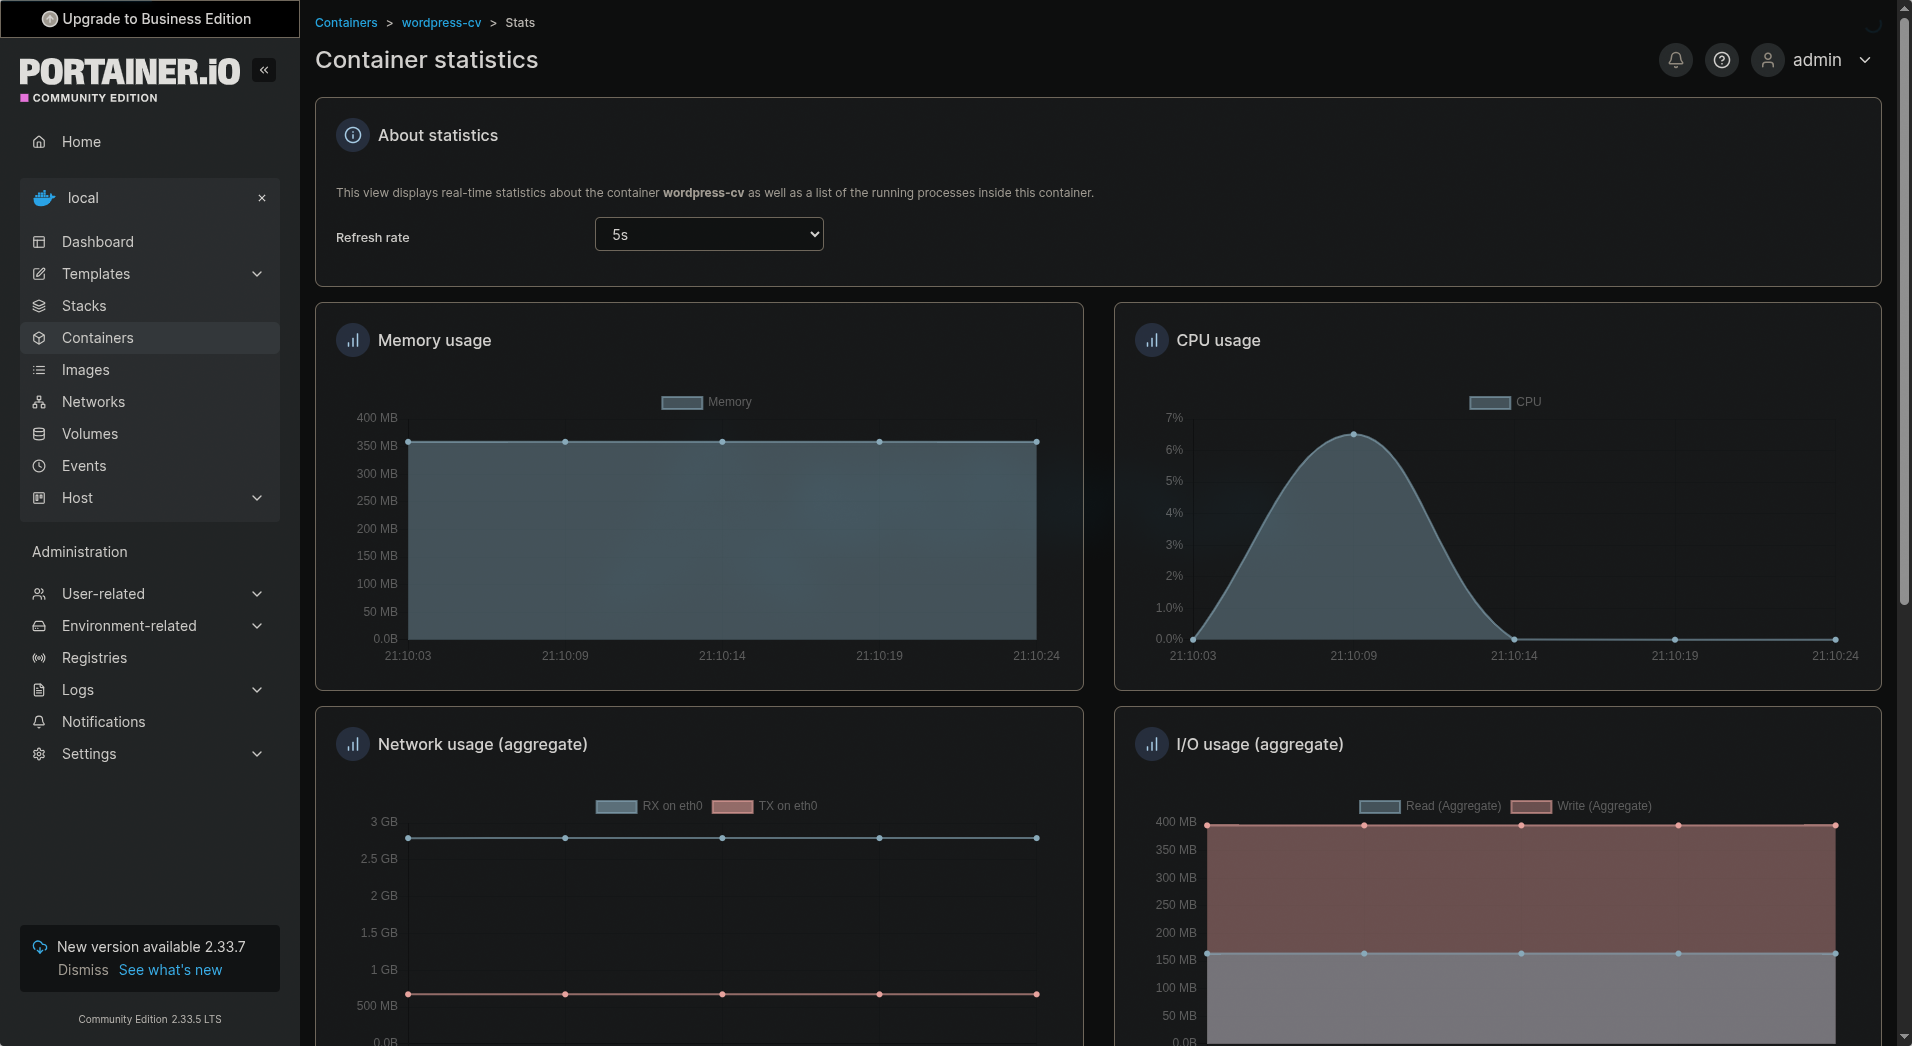
So I added Portainer, a lightweight web UI for Docker. It lets me see everything in one place: running containers, images, volumes, networks, logs, console access. Perfect for quick checks on my laptop.
Why Portainer (and why not earlier)?
I like CLI for creating/updating (full control, and i learn more).
But for daily monitoring – especially when away from SSH – a dashboard is faster.
Portainer is just one more container. No bloat.
This is how looks from command line ( the created date not too old because i was changing few things in de compose file earlier. ) :
docker ps 
and this is how it looks in Portainer:
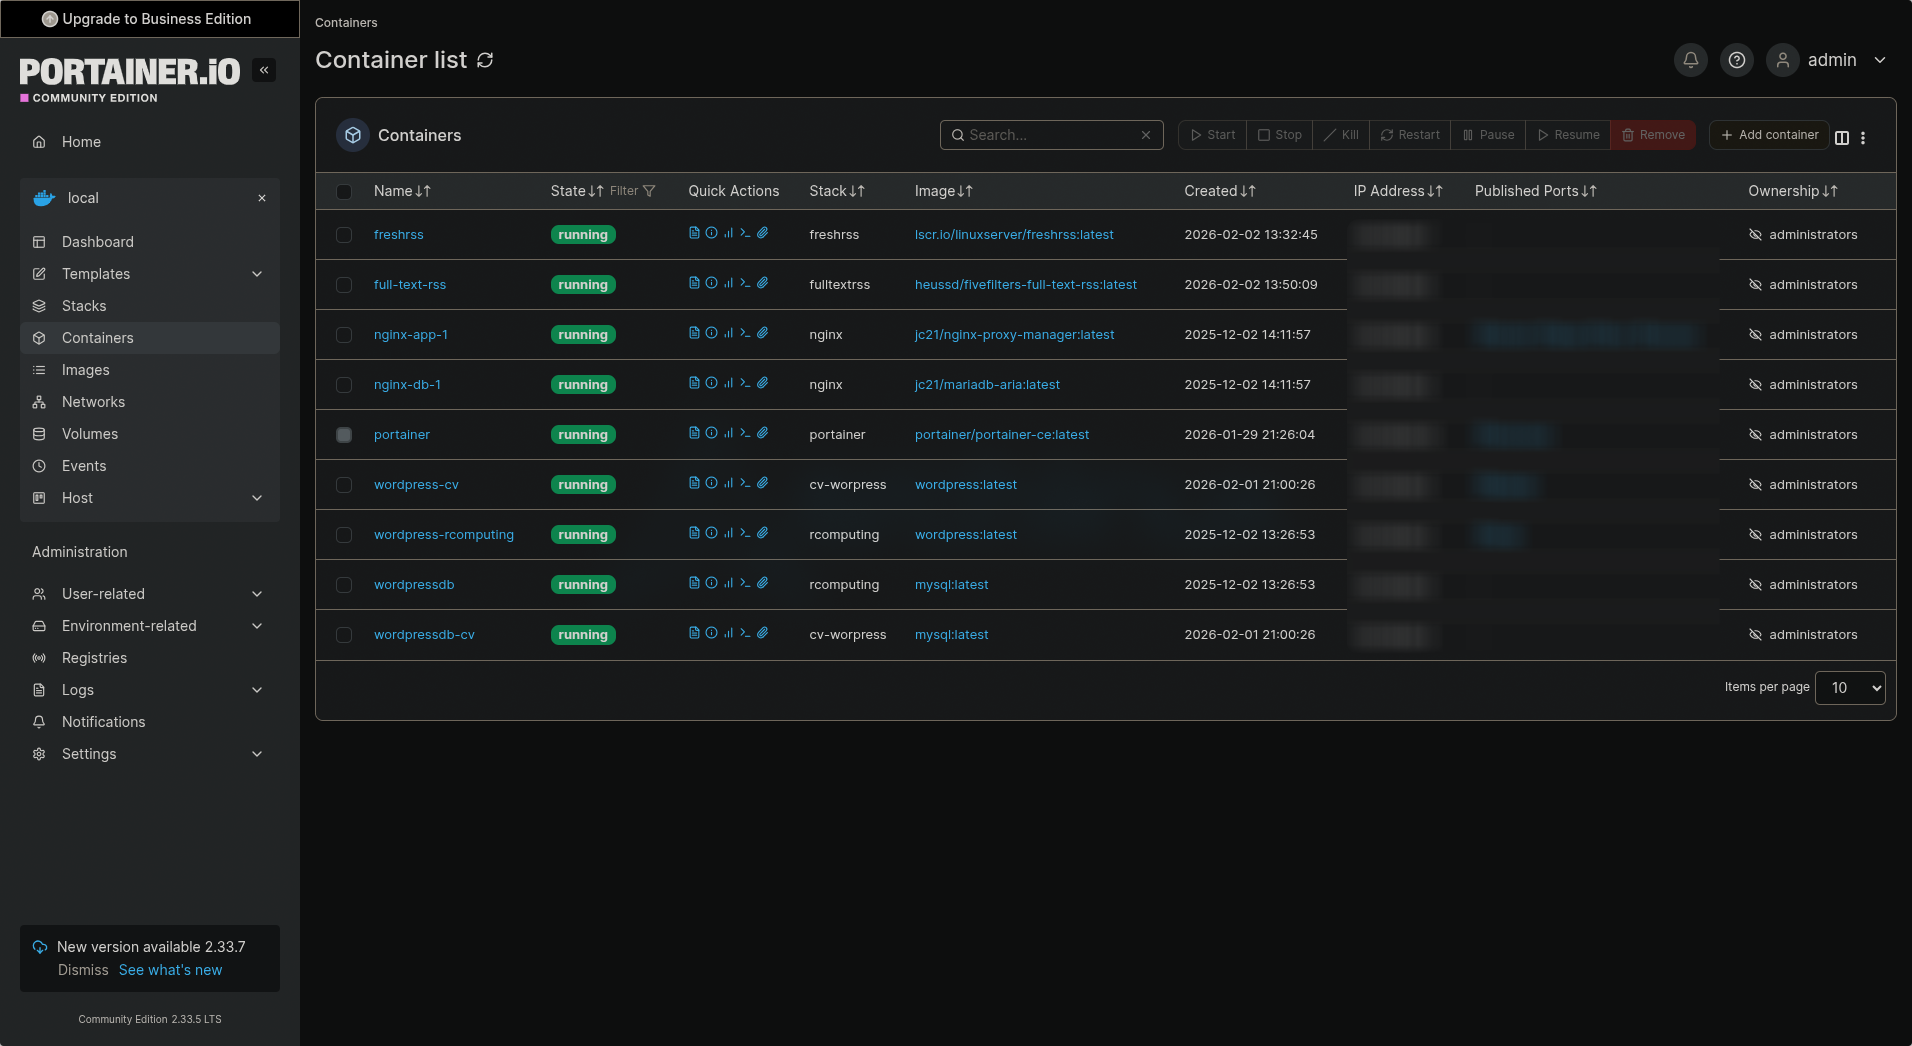
Much nicer. 😁
How I Set It Up
I run it as a Docker container on the same Oracle VM (Ubuntu Server) on the same docker network as my other dockers. This way the containers can communicate and my NGINX server can provide an SSL certificate and HTTPS for my Portainer docker web UI.
Created a dedicated directory:
mkdir -p ~/docker/portainer
cd ~/docker/portainer
Made a docker-compose.yml (you can download from my github):
Started it:
docker compose -f docker-compose.yml up -dFirst access: Open browser to http://your-server-ip:9000
Set admin password, login and done.
Also I did a subdomain on my CloudFlare account and configured my NGINX reverse proxy for HTTPS via Let's Encrypt, like the main site. But for internal use, plain 9000 is fine.
The Catch: Limited Access to CLI-Created Containers
Here's the thing, because I create/update all my containers from command line (not via Portainer stacks), Portainer shows them but with limited control:
- I can view logs, inspect, enter console, stop/start/restart.
- But no "edit" or "recreate" like with Portainer-managed stacks.
- Can't change env vars, volumes, or ports without CLI.
That I expected. Portainer does not "own" them. It is read-mostly for external containers. Still super useful for monitoring and quick fixes. If I ever want full Portainer control, I can recreate a service as a Stack (copy-paste compose file into Portainer UI).
What I Use It For Now
Quick status check of all services (WordPress, NGINX, FreshRSS, etc.)
View real-time logs without SSH
Enter container console for debugging
See resource usage (CPU/RAM per container)
The setup has been running stable since I added it. Fits perfectly with my minimal Omarchy-style self-hosting mindset (even though the VM is Ubuntu).
Have you added Portainer to your Docker setup?
Any tips for better integration with CLI workflows?
Robert Kokenyesi
Set up my self hosted FreshRSS server

Project URL: htttps://freshrss.rcomputing.co.uk
I was thinking about how I could speed up and make reading IT-relevant news more productive while staying up to date. After a little research, I found Chris Titus's videos on YouTube.
RSS is a better way to use the Internet
What I need for this project:
- A self-hosted FreshRSS server
- A solution to scrape websites that don't provide an RSS feed
Step 1: The plan
I already have a working VPS server on Oracle Cloud (free tier) that I use to host my website and a proxy server. I checked my website loading — it's pretty low because I don't have high website visits.
I decided to use the same server for this project via Docker. This is the most effective and fastest way. I already have a running Docker network and an NGINX proxy server for SSL certificates and domain names.

Step 2: Setting up the FreshRSS Docker server
For the best results, I used Chris Titus's walkthrough video and his blog post "Why We Don’t Browse the Internet Anymore". In the walkthrough video, he used the Docker run command, but I prefer using a Docker Compose file because it is easier for me to back up in the future.
So I took his settings from the video and the blog post and modified them based on my previous two Dockers (the ones I used for the WordPress server and my proxy server). On my server, I made a separate directory for the FreshRSS Docker Compose file.
So I went to my Docker directory and created a freshrss directory. Here I used Nano to create the docker-compose.yml file. I linked below my GitHub where you can see my docker-compose file.
mkdir freshrss
nano docker-compose.yml
You can see in the compose file that I set the FreshRSS Docker to the same Docker network I used previously for my WordPress and proxy server, so they can communicate with each other. Also, because I already use port 80 for WordPress, in the Docker Compose file I forwarded the FreshRSS server to port 83. Here, I needed an additional step to allow port 83 on the Ubuntu server temporarily until I set up the domain name in the proxy server.
sudo ufw allow 83Now we can start the Docker server. In the picture below you can see the outcome of the command. There are no errors, so we should be able to reach our FreshRSS server using the VPS server's IP address and port 83.
docker compose -f docker-compose.yml up -dStep 3: Set up SSL and domain name
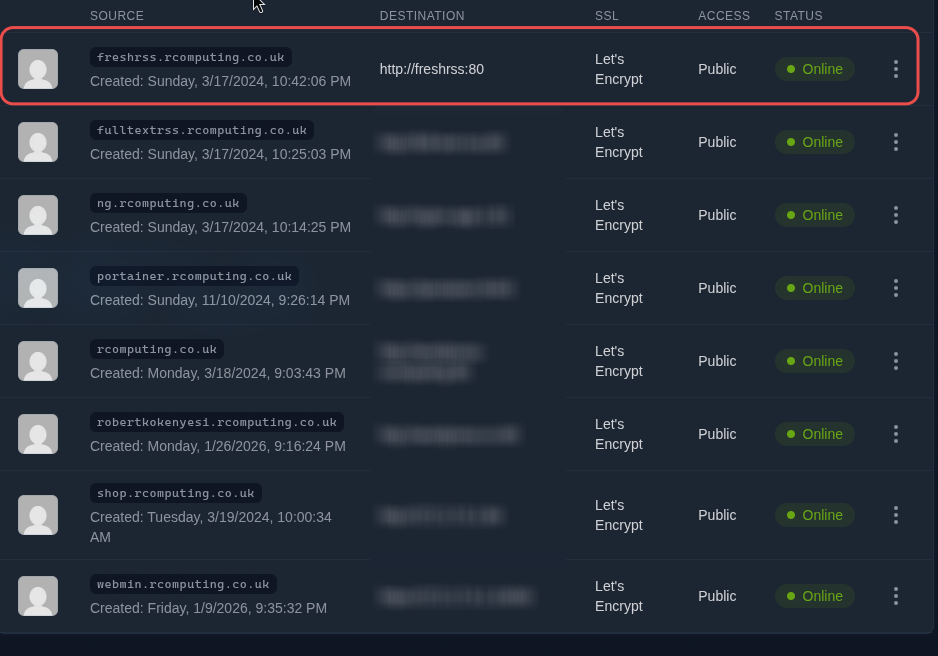
Now that the FreshRSS server is running, the next step was to set up a subdomain on Cloudflare under my rcomputing.co.uk domain.
After this, I logged in to my proxy server and added the subdomain, forwarding it to my FreshRSS Docker container using the basic port 80. I tested it, and after I saw it worked, I deleted port 83 from the firewall. I also composed down the Docker file and commented out the port section from the compose file. Because I set up the subdomain, I no longer need to forward it to port 83.
Step 4: Feed Aggregation
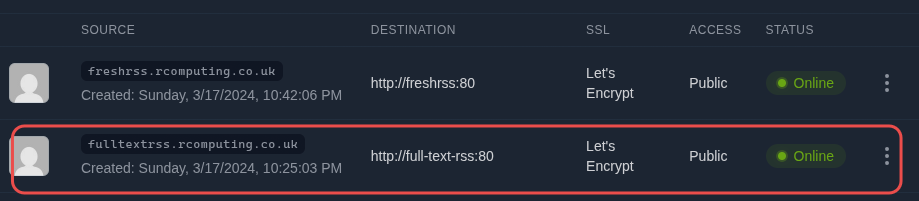
Not every website has an RSS feed, so I needed a solution for feed aggregation. Here I also used Chris Titus's walkthrough video and his blog post. I used the same tool he did — full-text-rss — but instead of using Docker run, I used a Docker Compose file again. You can find the link to my GitHub below.
full-text-rss docker-compose.yml
Basically, I did the same as with FreshRSS:
I made a directory in the docker directory for full-text-rss. Here, using Nano, I created the docker-compose.yml file. I saved it and started the Docker.
docker compose -f docker-compose.yml up -dYou can see in the Docker Compose file that after docker started, I was able to reach it via the VPS server's IP address and port 82. After a quick test, I also set up a subdomain for full-text-rss in my Cloudflare account and did the same settings in the proxy server as with FreshRSS, forwarded the subdomain to the full-text-rss container using port 80.
After this, I composed down the Docker, edited the docker-compose file (commented out the port sections), composed up again, and removed port 82 from the firewall rules.
Now I have a self-hosted FreshRSS server with a feed aggregator.
freshrss.rcomputing.co.uk
fulltextrss.rcomputing.co.uk
Feel free to reach out if you'd like more technical details.
Robert Kokenyesi.
Building My Self-Hosted Website (2022-2023 Project)

Project URL: https:/www.rcomputing.co.uk
The Begining
Migrating from SiteGround to Oracle Cloud Free Tier with Docker
In 2022, as a self-employed IT professional just starting out, I needed an affordable way to host my own website. I had zero experience building or managing websites at the time.
My first approach was simple: I signed up with SiteGround (they had a big first-year discount), installed WordPress through their one-click installer, and built the site using the Beaver Builder plugin. I registered my domain (www.rcomputing.co.uk) through Cloudflare and pointed it to SiteGround. It worked great for about a year.
Then the renewal email arrived—the price was going to jump significantly. I started researching cheaper (or free) long-term alternatives and decided on Oracle Cloud Always Free Tier. It offers a powerful VM with 4 ARM-based Ampere A1 cores and 24 GB RAM completely free (as long as you stay within limits).
Step 1: Setting Up the Oracle Cloud VM
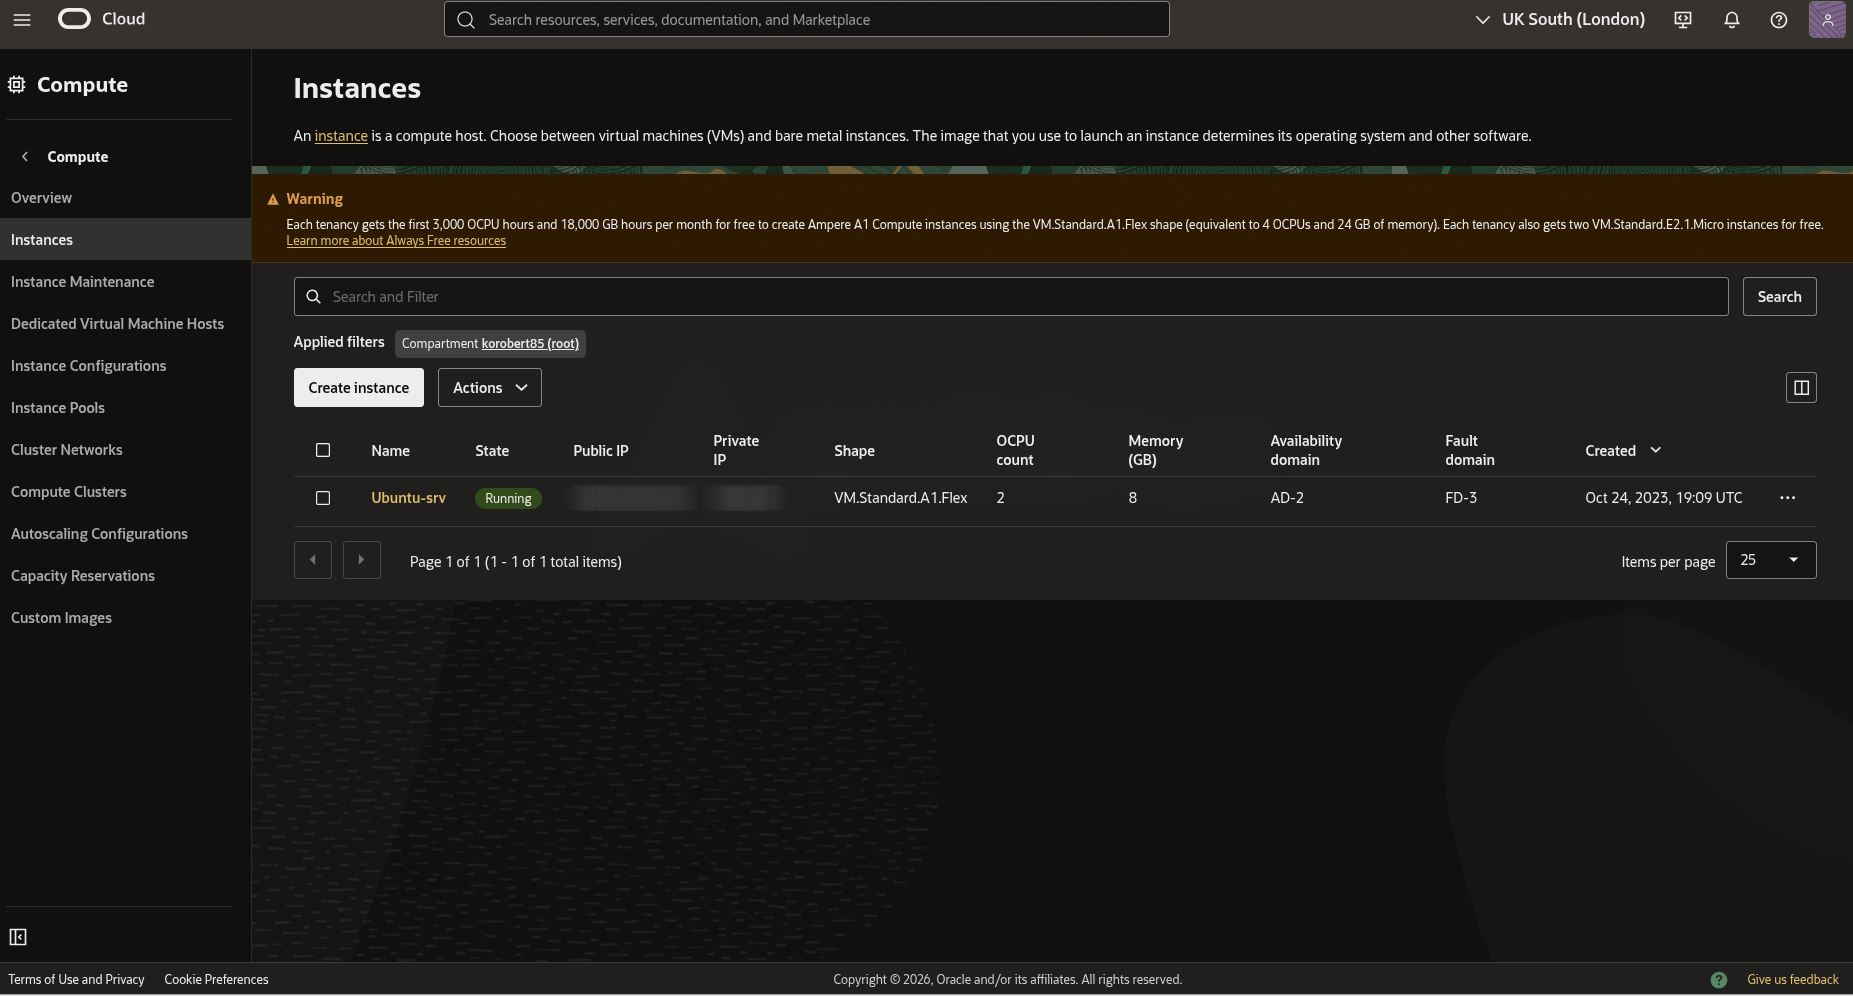
I created a VM.Standard.A1.Flex instance in Oracle Cloud and installed Ubuntu Server (LTS version for stability).
Key first steps after installation:
- Immediately configured SSH key-based access so I could connect securely from my Linux desktop without passwords.
- I didn't allocate all 4 OCPUs / 24 GB right away—I used a smaller shape initially (2 OCPUs with 8GB ram) to reduce the chance of the instance being reclaimed due to prolonged idleness. Oracle sometimes reclaims idle Always Free resources, so keeping some light activity (or occasional reboots/scripts) helps.
Step 2: Installing WordPress via Docker
Instead of installing WordPress directly on the host (which can get messy), I used Docker for clean, reproducible setups. Make it more clear and easy to do backup later I put every docker to there own directory. It is looks like that now.
I deployed the first container:
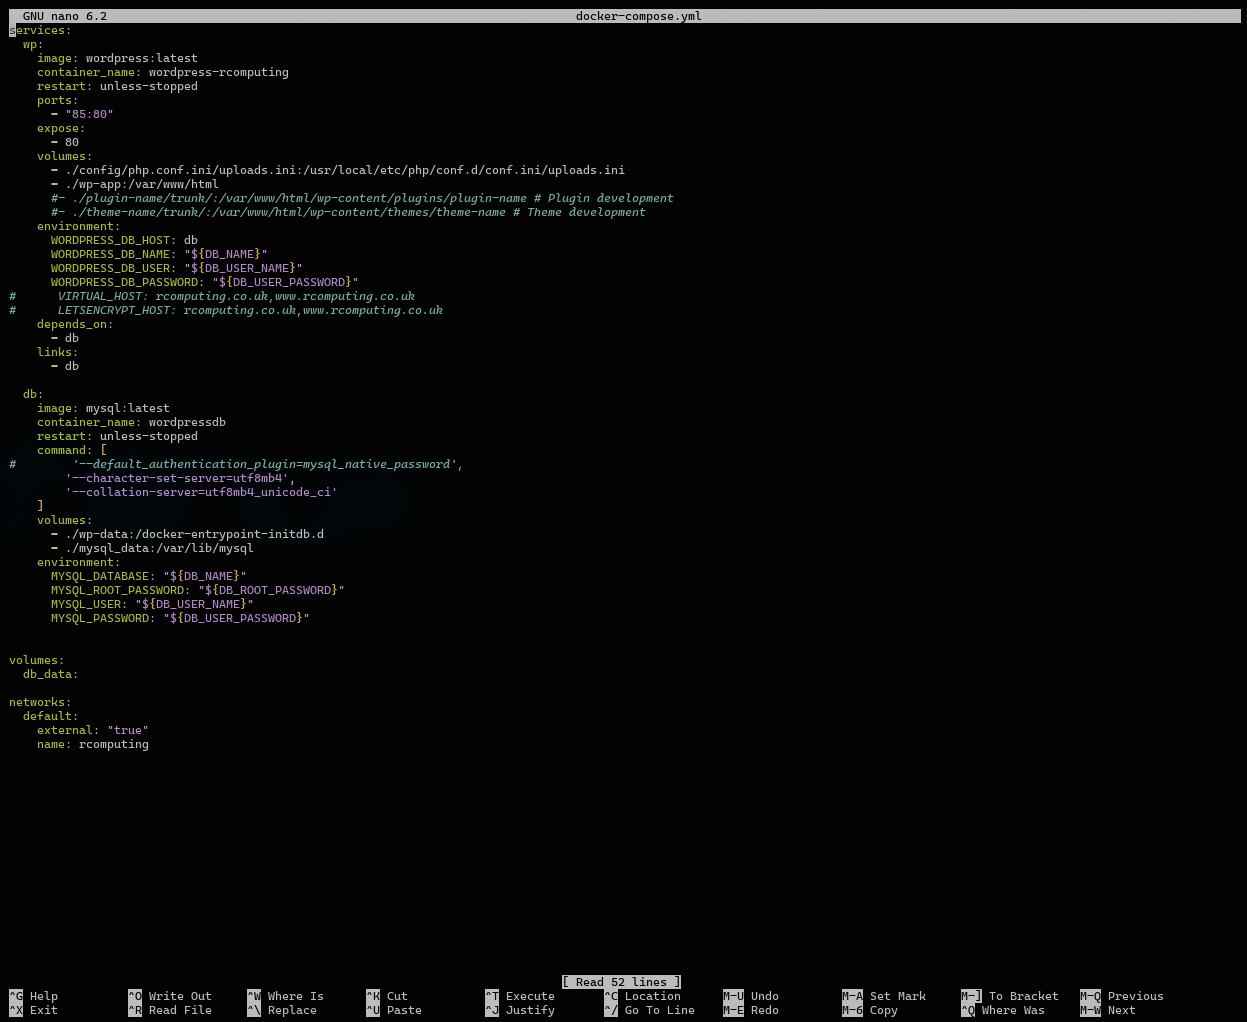
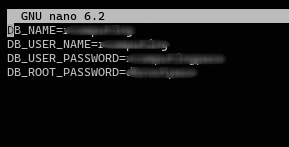
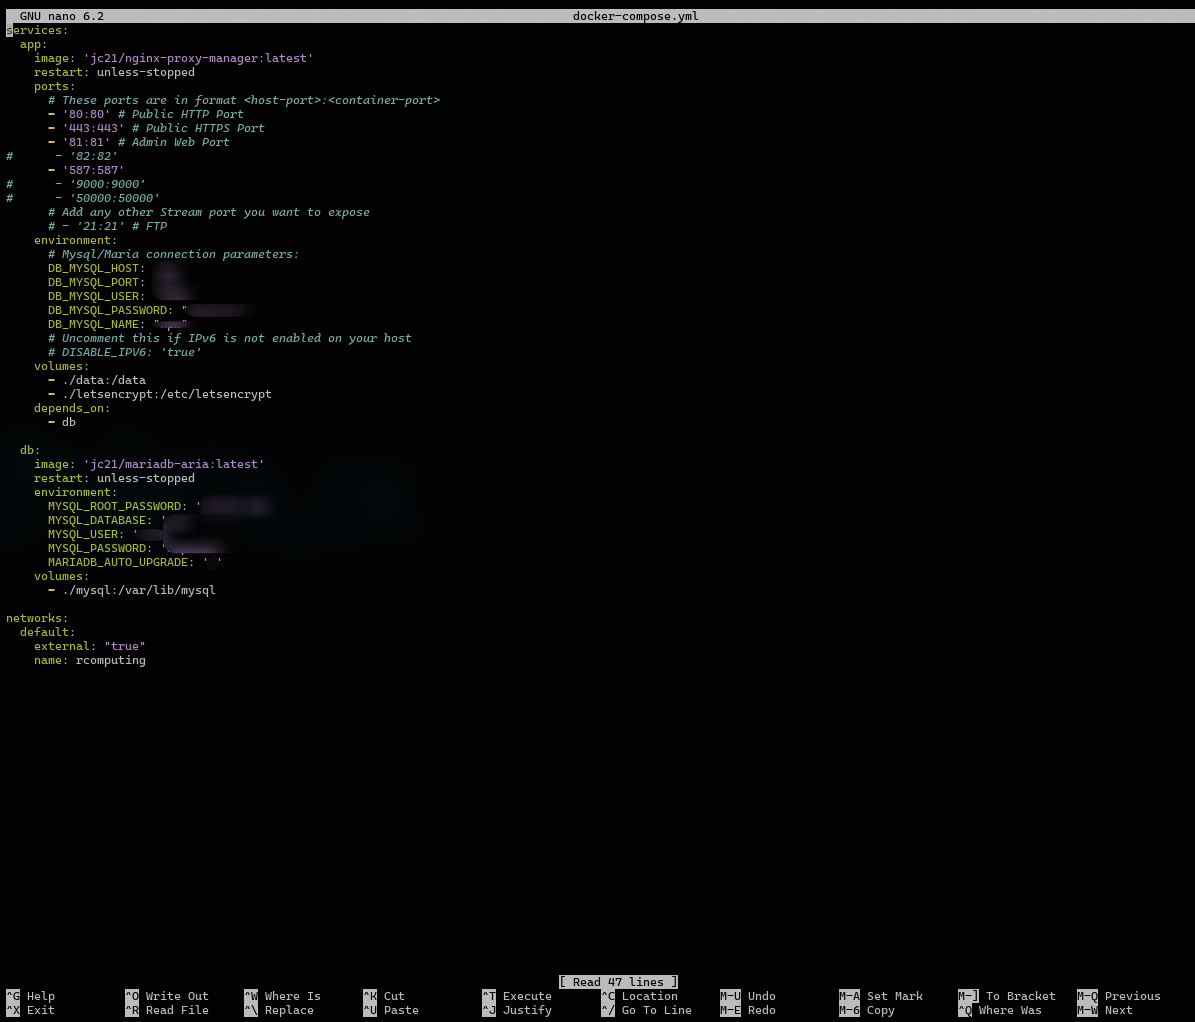
- WordPress (official image) + MariaDB/MySQL for the database. You can see the docker-compose.yml file below and also you can copy from my github is well. This compose file required an .env file ( also see below ) i blurred out my username and passwords so set your own.
- make a docker directory and a directory for the wordpress inside the docker directory.
mkdir docker
cd docker
mkdir rcomputing
nano docker-compose.yml
nano .env
docker compose -f docker-compose.yml up -d
Because I had never used Docker before, I spent a few hours reading documentation, watching YouTube tutorials, and learning the basics. Once I understood the fundamentals, I searched for a ready-made docker-compose file for WordPress, copied it, and customized it to fit my needs.
this is the .env file
Step 3: Migrating from SiteGround
To move my existing site:
- I backed up everything from SiteGround (files + database).
- I used a popular WordPress migration plugin like All-in-One WP Migration ( Please note the plugin what you can install via "add new plugin" in wordpress is limited to 12GB )
- Here is a video and a link the exact one i used All-in-One WP Migration,
- Exported the full site from SiteGround.
- Imported it into the my new Docker-based WordPress on Oracle Cloud.
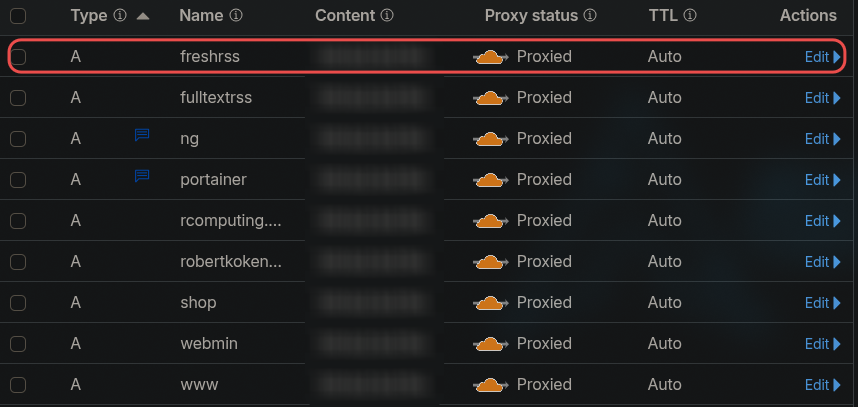
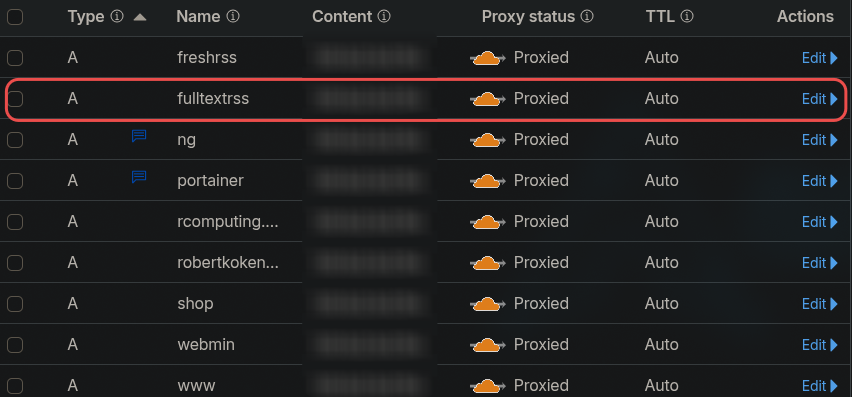
Once the content was over, I updated the A record in Cloudflare to point my domain to the Oracle Cloud public IP.
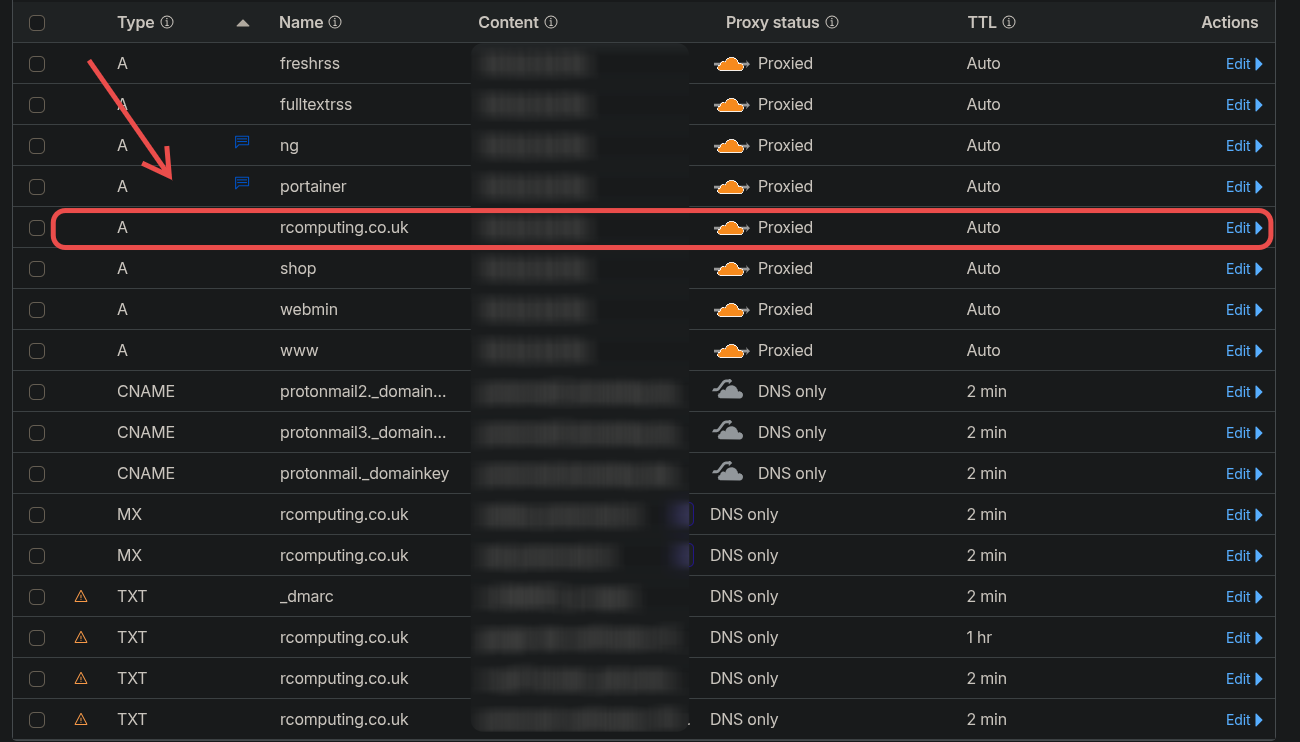
You can see on the picture few other A records those are a different projects.
Step 4: Fixing HTTPS / SSL
After the move, the site loaded over HTTP only, SiteGround had handled Let's Encrypt SSL automatically before.
To fix this:
- I set up NGINX in a separate Docker container as a reverse proxy in front of WordPress.
- NGINX now terminates HTTPS, redirects HTTP → HTTPS, and proxies requests to the WordPress container.
mkdir nginx
cd nginx
nano docker-compose.yml
docker compose -f docker-compose.yml up -d
I did the same as with the wordpress, I searched for a ready-made docker-compose file for NGINX, I copied it and customized it to fit my needs. In both compose files, I created a custom Docker network so the containers could communicate with each other securely and efficiently.
This setup keeps everything isolated and easy to backup/upgrade. After spinning up the containers, I had a fresh WordPress instance running locally on the VM. This gave me secure (https://) access without paying anyone. I can reach the nginx server as in a following at serverip:81 and i need to set an email address and password at the first login. The next step i set a subdomain for my NGINX server because at the moment the serverip:81 is an unsecured HTTP connection. So i went back to my cloudflare account and set it up.
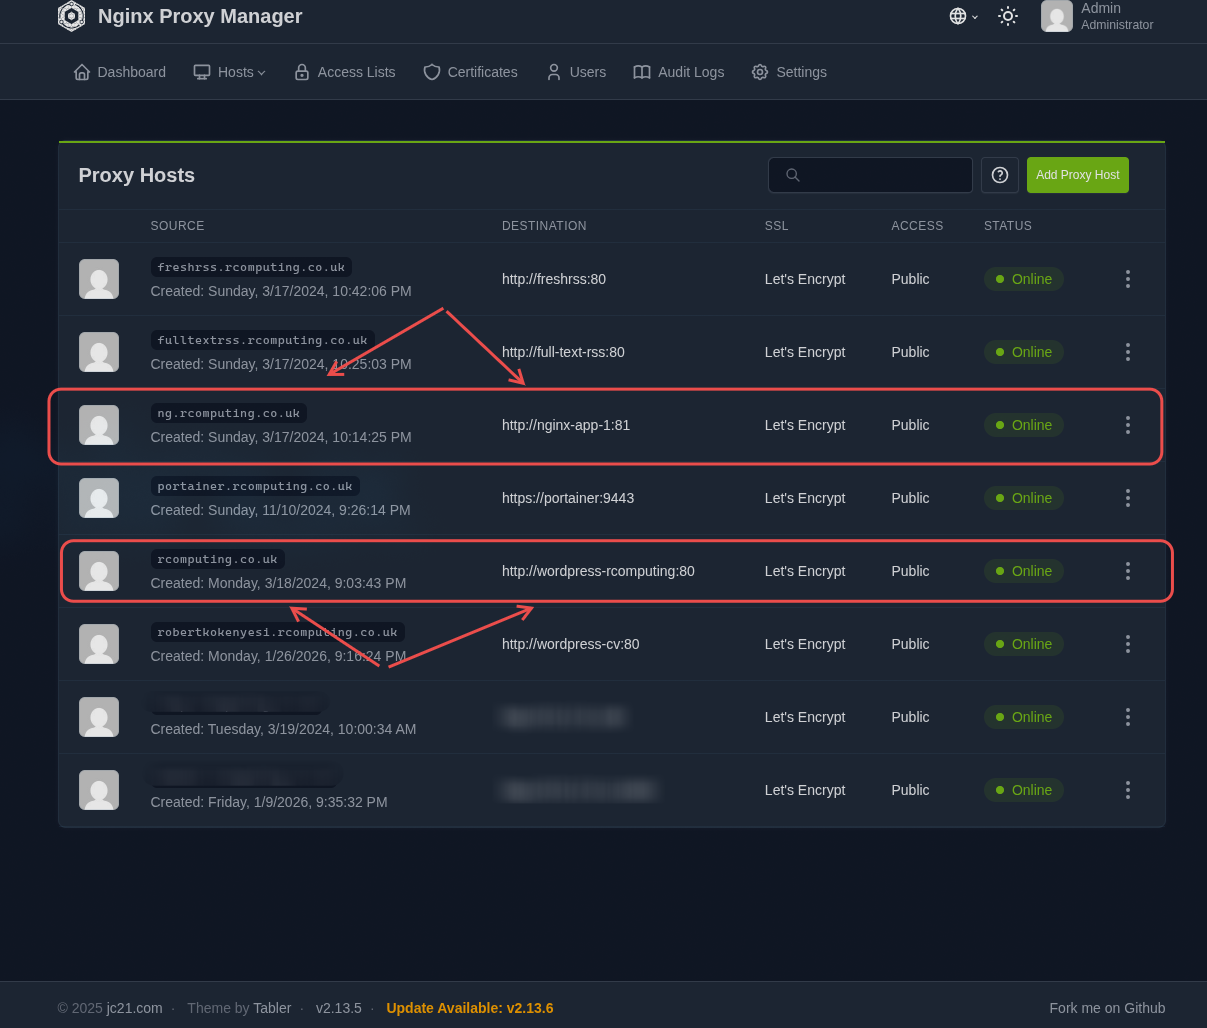
![]() Then i logged in to my proxy server and i added the following two domain name
Then i logged in to my proxy server and i added the following two domain name
and forwarded them to the docker containers name and port 80. Now i can reach my proxy manager and my website with HTTPS connection.
Current Setup Highlights
- Domain & DNS: Managed fully in Cloudflare (custom domain + subdomains).
- Web server: NGINX reverse proxy + WordPress in Docker.
- Backups: Simple custom Bash script that automatically backs up containers/volumes ( This is detailed in this project)
- Access: I manage everything via SSH from my main Linux machine (i use Omarchy btw). I also set up Remmina for occasional GUI remote desktop, but SSH is faster.
This project has been running reliably since late 2022/early 2023. It proves I can:
- Self-host production services on cloud infrastructure
- Handle Docker deployments and networking
- Manage domains, SSL, and migrations
- Automate basic tasks with Bash
It's live at www.rcomputing.co.uk and serves as a real-world example of my cloud, networking, and Linux skills while I look for full-time remote IT/system admin roles.
Feel free to reach out if you'd like more technical details.
Robert Kokenyesi.